Easy Salt Dough Recipe: Fun DIY Gifts & Ornaments
Are you searching for a creative outlet that blends simplicity with boundless possibilities? Salt dough ornaments provide an accessible and delightful avenue for crafting, perfect for both seasoned artisans and enthusiastic beginners.
Imagine transforming humble kitchen staples into charming keepsakes and personalized gifts. The allure of salt dough lies in its simplicity. Similar to magic modeling dough, it's a medium that welcomes experimentation and encourages the creation of unique items. Whether you're envisioning delicate sculptures, whimsical keychains, or homemade ornaments to adorn your home or share with loved ones, this versatile craft has something to offer everyone. The ease of salt dough, combined with the joy of crafting, makes it an ideal project for any time of the year, but especially around the holidays. The resulting ornaments become cherished family heirlooms, carrying the warmth of handmade gifts.
Beyond the aesthetic appeal, salt dough offers several practical advantages. The salt itself acts as a natural preservative, extending the lifespan of your creations. While sealing is not strictly necessary, adding a layer of Mod Podge, available in various finishes like matte, gloss, or satin, will significantly enhance the durability and longevity of your gluten-free salt dough ornaments. This step is especially recommended if you plan to hang your ornaments on a Christmas tree or display them in areas prone to humidity or handling.
For those seeking an alternative, consider exploring baking soda dough. This variation on the traditional recipe is quick to prepare, effortless to handle, and incredibly soft. A baking soda alternative might be the answer for those who are running short on ingredients or seeking a particular aesthetic for their creations.
This time-tested craft requires minimal supplies. You'll likely find most of the ingredients already in your pantry: all-purpose flour, salt, and water are the core components. From there, you can unleash your creativity by incorporating craft paint, twine, cookie cutters, and a rolling pin to bring your visions to life. The absence of complicated ingredients and the availability of household tools makes this project accessible and enjoyable for crafters of all skill levels.
Whether you're making them as gifts or creating them to enjoy, salt dough ornaments bring joy to every occasion. They are the perfect crafts for families looking to spend quality time together or individuals seeking a mindful creative process. They are easy and quick to prepare. Salt dough recipes are flexible and welcoming to creativity, allowing you to build and customize each project. The possibilities are endless!
To guide you through the process, here's a streamlined approach to creating these festive embellishments:
The Basic Recipe:
In a medium bowl, begin by mixing 1 cup of flour with 1/2 cup of salt and 3/4 cup of cinnamon. This combination creates the structural base, the preservation element, and also infuses the dough with a warm, inviting aroma. Next, add 3/4 cup of water to the dry ingredients. Start mixing together with a spoon. If the dough is still dry, add water one teaspoon at a time. Be patient while mixing, as the perfect consistency may take a little tweaking.
Crafting the Dough:
Once you have a ball of dough, place it on a sheet of parchment paper (remember to sprinkle flour on the paper first to prevent sticking!) and roll it out to approximately 1/4-inch thickness. This thickness provides enough support for the ornaments while allowing them to dry and bake properly.
Shaping Your Creations:
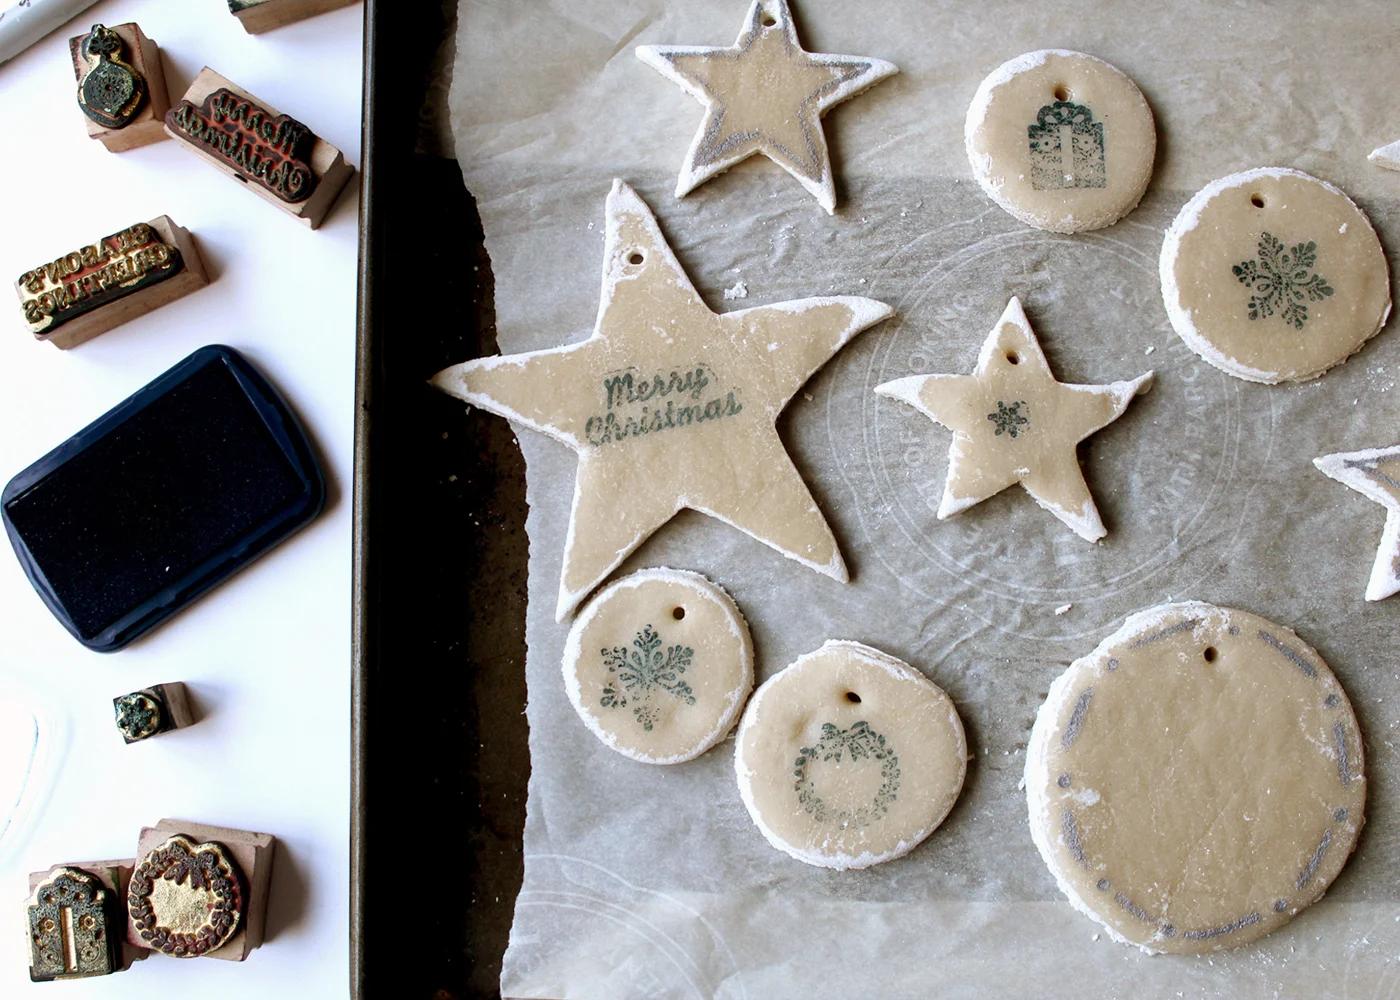
Use cookie cutters to cut out desired shapes from the dough. To create a hole for hanging, use paper lollipop sticks or a skewer. Then, its time to bake the ornaments!
Drying and Decorating:
You have the option to either air-dry your creations or bake them. If baking, preheat your oven to 250 degrees Fahrenheit and place the ornaments on a lined cookie sheet. Bake for approximately 1-3 hours, or until they are completely dry. Once dry, allow your ornaments to cool completely before decorating.
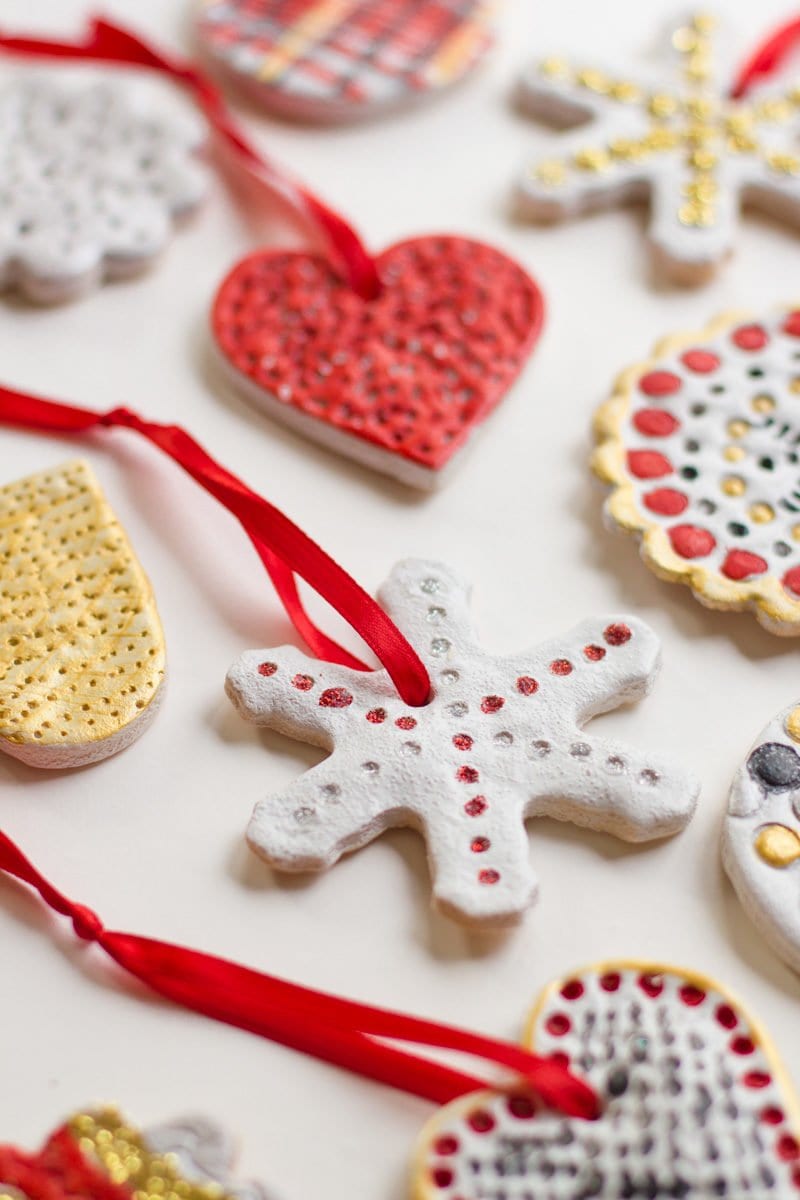
Embrace your artistic license. If you plan on painting, acrylic paints are highly recommended. You can add a touch of cinnamon to the paints if kids are joining the project. This adds an extra sensory dimension. For a final layer of protection and a polished look, apply a clear finishing spray or Mod Podge to the ornaments. This ensures their longevity, protecting them from moisture and damage. Whether you're adding detailed designs or simple washes of color, your creativity is what brings each ornament to life.
If you do not want to paint the ornaments you can spray them with a clear finishing spray or use mod podge to return them to a deep brown color before hanging them on the tree. Remember that the fun is in the making, and no matter what shape, colour or size the final result is, it will be one-of-a-kind!
Supplies needed for salt dough ornaments
To get going with salt dough ornaments, youll need:
All purpose flour, salt, warm water, craft paint, twine, cookie cutters, and a rolling pin.
The process of salt dough ornament creation is an excellent way to spend quality time with family, create heartfelt gifts, or explore your artistic side. Its also a practical solution, as the basic recipe is easy to execute. From the initial mixing of ingredients to the final flourishes of paint and embellishments, salt dough ornaments are a rewarding endeavor.
Alternative Recipe:
If you are looking for another alternative you can use bakers clay. Consider creating gorgeous white decorations.
Gluten-Free Considerations:
For gluten-free salt dough ornaments, ensure that the flour used is a gluten-free option. Remember that if you plan to seal your gluten-free salt dough ornaments, you can use a product like Mod Podge, with options like matte, gloss, or satin, to choose from.
Recipe Variations:
You can divide the recipe in half to make a smaller portion of dough if desired. If you want to add color, you can make a well in the flour mixture and slowly pour in the colored water, mixing after youve added half of the liquid. This helps to distribute the color evenly and ensures that it is well-integrated into the dough.
No-Bake Option:
Remember that there are no-bake salt dough recipes, giving crafters another way to create lovely art projects. After your creations are dry, you can paint them with acrylic paints.
Storage:
You can store salt dough in an airtight container for future use. This ensures that your dough remains fresh and pliable.
By embracing these simple tips and techniques, youre well-equipped to embark on a delightful journey of creating salt dough ornaments, transforming basic ingredients into memorable keepsakes. You can adjust and tailor the recipe to meet your individual needs, and your creativity can shine as you mold, bake, and decorate these precious pieces.
No Bake Salt Dough Ornaments — Tag & Tibby Design
How to Make Salt Dough Ornaments Wholefully

Salt dough ornaments Artofit
